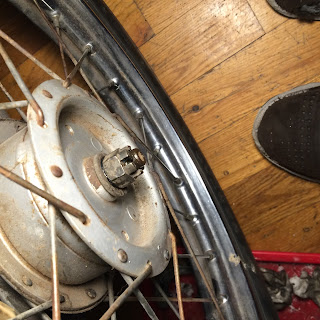
Today, I pulled off exhaust so I could get the back wheel off so I could put in the new pads.
The exhaust studs are funky. One comes out of the engine completely. On the other one, the nut just comes off. They tighten down okay, so they'll hold the exhaust on, right? I hope so.
It was cool to see the back wheel off and I'm pleasantly surprised that I didn't really have to fight with any stuck parts to take it off. It was need to see that it's just a splined axle driving the rear wheel. Definitely a different setup than the bicycles I'm used to working on.
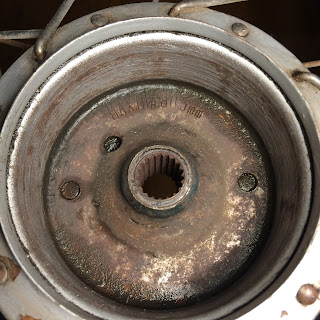
There are also a couple of kinda sketchy marks in the side of the hub. I'm not too worried but I'm going to try to keep an eye on them.
Looking at the old pads, they didn't seem bad at first, but then on further inspection, I noticed one of them had some grooviness to it so I guess it's not a bad plan to replace the pads.
So I wiped out dead spider pieces (I actually found crumbly bits of spider in there, no joke) gave the drums a light sanding, cleaned the drums with isopropyl alcohol and put in the new pads. The drum has 80.5mm stamped on the inside. The front one said the same thing if I recall correctly. It's nice that the 1981 Honda express nc50 uses the same shoes front and back. For those playing along at home, I put in Honda part number 06430-131-405.
I'm refining my technique with the springs. To pull them off I stuffed a screwdriver under the spring pointing up towards the middle of the upper brake pad and pried up and that popped the spring off the boss. Then I got the spring out of the slots with a pair of pliers. It's sounds really easy but there was some cursing and frustration. It did go easier than the front wheel, though. The pic below shows where I did the prying. I took it right after I popped the spring off the boss.
Getting the spring on the new shoes wasn't as hard as the front wheel was either. I put the shoes on the bike, then put the spring in the holes in the shoes and pried the shoes open (like when the brake lever gets pulled) and used the pliers to push the spring over the boss by clamping against the spring and the bottom shoe. I bet I'm not conveying this properly through words but I basically put the pliers around the spring and pads right next to the boss and squeezed the handles. At the same time opposite the boss I had a screwdriver wedging the pads open (opening the pads seems to give you more slack on the spring). Hopefully the pic below will help. If that still doesn't help, leave a comment and I'll try to figure out a better way to convey it to you. Or just leave a comment if it worked. I'm going be surprised if anyone leaves a comment actually.
After the brake work, I swapped out that spring for the correct one on the end of the choke cable (mentioned the other day) and I guess it's better. I mean, I don't think it's any worse. Below are the two different springs. The longer, thinner one is the one it was supposed to have in there.
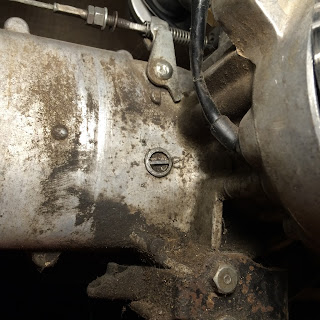
While digging around, I found a strange mark on the transmission case. I wonder if it's something about the casting. At first I thought it was a plug for draining the fluid but there's already one right next to it. It's out of view in the picture, but I assure you it's there.
I also still have to go get some cotter pins. There's an empty hole on the back wheel that I know should really have one in there. For ya know, safety. So the wheel doesn't fall off. I do feel good about having the one used cotter pin on the front wheel though. I'd actually rather lose the back wheel than the front. Losing the front means probably going ass over teakettle and really bad things. Losing the rear wheel seems like there'd be skids and sparks and probably a good laugh after the shaking went away. I hope I keep both wheels on though, so cotter pins are on the shopping list.
I also cleaned up the dead spider bits and brake dust before my girlfriend got home so I look like a ninja mechanic. I'm already repairing my Honda express in the kitchen/living room, I don't want to mess up the good thing going on here.
Next on the list is lights/electrical. When my lovely girlfriend got home, she asked me if I thought I was 75% done and I hesitated. Every time I fix something, I find something new wrong with the bike, but I think I could agree with the bike being 75% ready to go around the block. It still needs a bunch of stuff, but if I can get some working lights on there and make sure it sparks and make sure I can make it stop running when I want, I'm going to be pretty stoked.
I'll let you know how it goes.
In other slightly related news, I talked to a dude on an electric scooter with a Vermont plate the other day while stopped at a light on my bicycle. Apparently, that rumor that Vermont will register anything is true. I was excited to see it in real life and not just hear about it on a forum somewhere. I'm going to keep that as a backup plan if the NY DMV doesn't work out when I try to get this thing legit papers so as to be not riding dirty.
So the next phase is the electrical. I have a multi meter, a color wiring diagram (that black and white one is cruel) a regulator/rectifier, a headlight, taillight, a spool of wire, connectors and a soldering iron. Fingers crossed. If anyone read this far, wish me luck!


No comments:
Post a Comment